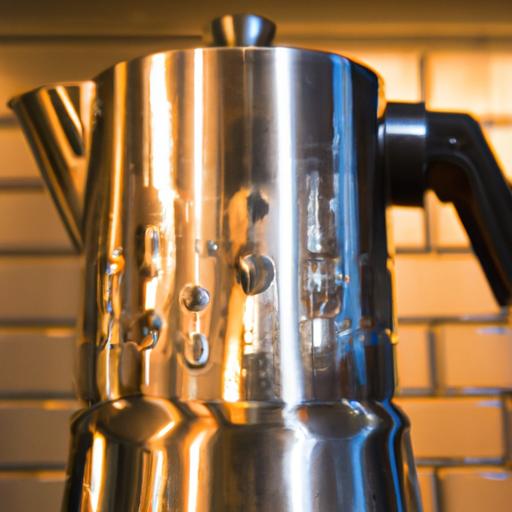
If you’re a coffee lover who enjoys the convenience and simplicity of brewing a delicious cup at home, then brewing coffee in a percolator might just be your perfect match. With its unique brewing method and rich, robust flavor, percolators have been a beloved choice for coffee enthusiasts for decades. But how can you ensure that your percolator brews the perfect cup every time? Look no further! In this article, we’ve compiled the top six tips for brewing coffee in a percolator, so you can elevate your coffee experience to new heights. From choosing the right grind to mastering the brewing time, these tips will help you unlock the full potential of your percolator and savor every sip of your favorite brew. So grab your mug and let’s explore the wonderful world of percolator coffee!
Choosing the Right Percolator
When it comes to choosing the right percolator, there are a few factors to consider. First and foremost, you’ll want to think about the material of the percolator. Stainless steel is a popular choice that is durable and easy to clean. However, some people prefer the classic look of a glass percolator. Think about your personal preferences and what will fit best with your kitchen aesthetic.
In addition to the material, you’ll also need to decide on the size of your percolator. Are you a coffee aficionado who wants to brew large batches? Or do you prefer smaller, more intimate servings? Keep in mind that larger percolators may take longer to heat up and reach the optimal brewing temperature. Consider how much coffee you typically consume and choose a size that suits your needs.
Lastly, a detachable power cord can make your brewing experience much more convenient. Being able to detach the power cord allows for easier storage and cleaning. It also gives you the flexibility to move the percolator around without any restrictions. So, keep an eye out for a percolator with a detachable power cord for added convenience.
Grinding the Coffee Beans
To achieve the best flavor and aroma from your coffee, using freshly ground beans is essential. Instead of purchasing pre-ground coffee, opt for whole beans. This allows you to have control over the coarseness of the grind, resulting in a more flavorful brew. Whole beans also preserve the oils and flavors better compared to ground coffee, which can quickly lose its freshness.
Investing in a burr grinder is highly recommended for the perfect grind. Unlike blade grinders which can create inconsistent particle sizes, burr grinders offer more precision and consistency. This ensures that your coffee grounds are uniform in size, leading to a more balanced extraction.
When grinding the beans for percolation, aim for a medium coarseness. This allows water to pass through the grounds, extracting desirable flavors without over-extraction. It strikes a balance between a rich, full-bodied taste and avoiding any bitterness that can occur with finely ground coffee.
Measuring the Coffee
Measuring the coffee is crucial for achieving the desired strength and flavor in your cup. The right ratio of coffee to water will depend on personal preference, but a good starting point is using one to two tablespoons of coffee per cup of water. This ratio allows for a bold, flavorful brew without being overwhelming.
Consider the strength of your coffee when choosing the amount of coffee to use. If you prefer a stronger cup, lean towards the two-tablespoon measurement. On the other hand, if you like a milder cup, opt for one tablespoon per cup. Feel free to experiment and adjust the measurement based on your taste preferences.
It’s important to keep in mind that personal preference plays a significant role in determining the ideal coffee strength. Some people may prefer a stronger, more robust cup of coffee, while others may enjoy a milder and smoother taste. Take the time to discover your personal preference by adjusting the coffee-to-water ratio until you find the perfect balance.
Adding Water
Water quality plays a significant role in the taste of your coffee. To ensure the best possible result, it’s recommended to use filtered water. Filtered water removes impurities and undesirable flavors that could affect the overall taste of your brew. It allows the natural flavors of the coffee to shine through without any interference.
Measuring the water is just as important as measuring the coffee. Following the recommended coffee-to-water ratio, carefully measure the desired amount of water. Too much water can result in a weak and diluted cup, while too little water can lead to an overly strong and bitter brew. A scale can be handy for achieving precise measurements.
Preheating the water is another crucial step in brewing coffee with a percolator. By bringing the water to a near-boiling temperature before beginning the brewing process, you ensure optimal extraction and flavor development. Preheating also helps maintain a consistent brewing temperature throughout the process, resulting in a more balanced and satisfying brew.
Assembling the Percolator
Before you start brewing, you’ll need to assemble your percolator. Begin by attaching the basket and stem, making sure they are securely in place. This ensures that the coffee grounds will stay contained within the basket and allows for proper percolation. Double-check that everything is in position to avoid any mishaps during the brewing process.
After attaching the basket and stem, it’s time to secure the lid of the percolator. The lid helps create the necessary seal for proper brewing and prevents any potential spillovers. Make sure the lid is tightly closed to maintain the internal pressure and temperature, resulting in a consistently great cup of coffee.
Before starting the brewing process, give everything a final double-check. Ensure that the basket is properly attached, the lid is secured, and all components are in place. Taking a moment to confirm everything is in order will save you from any potential complications or accidents during the brewing process.
Brewing Process
Now that your percolator is assembled, it’s time to begin the brewing process. Start by filling the percolator with the appropriate amount of water for the desired number of cups. Use the recommended coffee-to-water ratio to determine the correct measurement. Keep in mind that the percolator’s capacity may be slightly less than advertised due to space taken up by the internal components.
Once the water is in the percolator, it’s time to turn on the heat. Whether you’re using a stovetop percolator or an electric percolator, be sure to follow the manufacturer’s instructions for heating. Slow and steady heating is key to achieving optimal extraction and avoiding any scorching or burning of the coffee. Take your time and allow the brewing process to unfold naturally.
Monitoring the percolation process is important to ensure the desired strength and flavor. Keep an eye on the percolator and listen for the distinct percolation sound. As the water reaches the boiling point, it will pass through the basket, saturating the coffee grounds and extracting the flavors. The percolation sound will gradually become more pronounced as the brewing progresses.
Controlling the Temperature
Maintaining the right temperature throughout the brewing process is crucial for the best tasting coffee. It’s important to avoid boiling the coffee, as this can result in over-extraction and a bitter taste. Keep the heat at a steady, medium-low setting to prevent the coffee from boiling.
If you find that your coffee is brewing too slowly or not at all, it may be necessary to adjust the heat slightly. Electric percolators usually have adjustable heat settings, allowing you to control the brewing temperature more precisely. If you’re using a stovetop percolator, adjusting the burner’s heat level accordingly can help achieve the optimal brewing temperature.
Using a thermometer can be a helpful tool to ensure the brewing temperature is within the desired range. This allows for more precise control over the brewing process, ensuring that you achieve the perfect temperature for extracting the ideal flavors from your coffee. Experimenting with different brewing temperatures can also help you fine-tune your brewing technique.
Brewing Time
The brewing time for a percolator can vary, depending on personal preference and the specific percolator model. It’s essential to follow the manufacturer’s instructions for the recommended brewing time. This information can usually be found in the percolator’s user manual or on the packaging.
However, it’s also worth experimenting with different brewing times to find what works best for your taste buds. Longer brewing times tend to result in a stronger and more robust cup of coffee, while shorter brewing times can produce a milder flavor profile. Take note of the brewing time for each batch of coffee and adjust accordingly to achieve the desired strength and flavor.
It’s important to avoid over-extraction, as this can lead to a bitter and unpleasant tasting cup of coffee. Pay attention to the brewing time and make adjustments if necessary. Remember, brewing coffee is an art, and personal preference plays a significant role. Finding the perfect brewing time is all about discovering your preferred flavor profile.
Cleaning and Maintenance
Proper cleaning and maintenance are key to prolonging the lifespan of your percolator and ensuring delicious cups of coffee every time. After each use, it’s essential to clean the percolator thoroughly. Disassemble all the removable parts and wash them with warm, soapy water. Use a soft brush to remove any coffee residue or oils from the basket and stem.
Mineral deposits can accumulate in your percolator over time, affecting the flavor of your coffee. To remove these deposits, fill the percolator with a mixture of vinegar and water. Let it sit for a few hours or overnight, then rinse thoroughly with water. This will help dissolve and remove any mineral buildup, leaving your percolator clean and ready for the next brew.
Regularly replacing worn-out parts is also important for maintaining the performance of your percolator. Over time, rubber seals and other components may deteriorate, affecting the brewing process and the quality of your coffee. Check with the manufacturer or refer to the user manual for recommended replacement intervals for various parts.
Troubleshooting
While brewing coffee in a percolator is generally a straightforward process, there are a few common issues that may arise. By being aware of these troubleshooting tips, you can overcome any challenges and continue enjoying your delicious cup of coffee.
If your coffee turns out weak, the most likely culprit is using too little coffee or brewing for too short a time. Adjust the coffee-to-water ratio and brewing time to achieve a stronger cup of coffee. Conversely, if your coffee tastes bitter, it may be due to over-extraction from using too much coffee or brewing for too long. Adjust the ratio and brewing time to achieve a milder taste.
If you find grounds in your coffee, it may be because the coffee-to-water ratio is too high, causing the grounds to spill over the basket. Adjust the ratio or consider using a coarser grind size to prevent grounds from escaping. Additionally, make sure the basket is securely attached and positioned correctly within the percolator.
By following these tips and troubleshooting common issues, you can confidently and successfully brew coffee in your percolator. Enjoy the rich aroma and flavor that a percolator brings, and embrace the art of brewing coffee to suit your personal taste preferences. Happy brewing!


